Setting up external forwarding in Microsoft 365
When setting up forwarding from Microsoft 365 based email to Mimir, you may need take an additional step to complete the process. Microsoft 365 accounts default to block automatic email forwarding as part of their outbound spam protection.
You will see a specific bounce message in your inbox at Microsoft 365 after attempting to set up forwarding to Mimir if you need to adjust this setting. The text of the bounce will include this line:
550 5.7.520 Access denied, Your organization does not allow external forwarding. Please contact your administrator for further assistance. AS(7550)
This bounce does not mean that Mimir rejected the message though we know it sounds like that is what it says — in fact Microsoft 365 did not attempt to deliver it to Mimir because your Microsoft 365 account is set to not allow automatic external forwarding.
Your Microsoft 365 administrator will need to allow automatic external forwarding for any 365 based email addresses you want to forward to Mimir.
We’ve created this guide to help your administrators find and change the outbound spam protection policy that is blocking your forward.
For Microsoft 365 Administrators
Configuring external email forwarding in Microsoft 365 is Microsoft's documentation of the security features they've put in place. Below you will find a step-by-step guide for changing the specific portion of the automatic forwarding settings needed to work with Mimir.
Enable Automatic External Forwarding for All Mailboxes
1
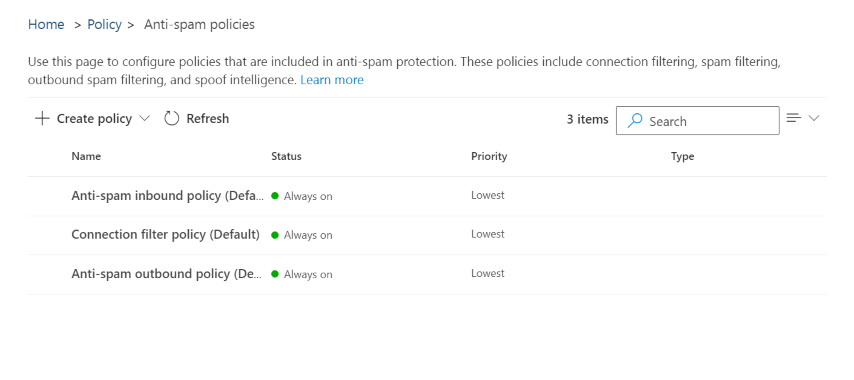
Log in to Microsoft 365 Defender as a Microsoft 365 administrator and choose Email & collaboration > Policies & rules > Threat policies > Anti-spam policies or head directly to the Anti-spam settings page here: https://security.microsoft.com/antispam
If you do not see those options or no policies display on that page, the Microsoft 365 user you have used to log in does not have sufficient permissions to make these changes. Make sure you are logging in as an administrator for your account.
Note that the policies you see in your own admin may differ from those shown here, as these are only the default policies.
2
Click on Anti-spam outbound policy (Default) and scroll down to click the Edit protection settings link at the bottom of the sidebar.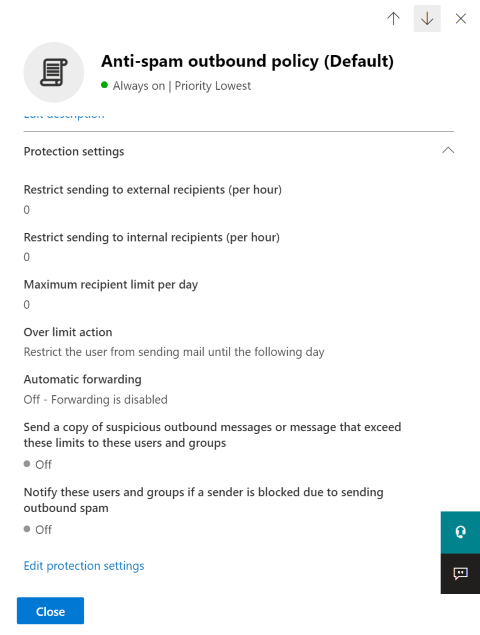
3
Find the section called Forwarding Rules, and the dropdown list called Automatic Forwarding Rules. Pull that list down and choose On - Forwarding is enabled. Click Save at the bottom. 
Enable Automatic External Forwarding for Individual Mailboxes
1
Log in to Microsoft 365 Defender as a Microsoft 365 administrator and choose Email & collaboration > Policies & rules > Threat policies > Anti-spam policies or head directly to the Anti-spam settings page here: https://security.microsoft.com/antispam
If you do not see those options or no policies display on that page, the Microsoft 365 user you have used to log in does not have sufficient permissions to make these changes. Make sure you are logging in as an administrator for your account.
Note that the policies you see in your own admin may differ from those shown here, as these are only the default policies.
2
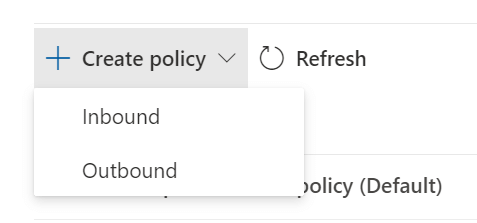
Click + Create policy and choose Outbound.
3
Give your new outbound spam filter policy a Name and Description.
Click Next and search to find the user account you want to allow to forward, i.e. the email account that you are forwarding to Mimir, which will display under the Users field after you select it.
Click Next again, scroll down to the Forwarding rules section, and click the dropdown under Automatic forwarding rules. Choose On - Forwarding is enabled, then click Next.
Review the settings on the last screen and click Create to create your new outbound policy for the specified user(s).
